


A good set of antlers does not need a bulky plaque to earn its place on the wall. When the rack has strong character, clean color, and a story behind it, a low-profile mount lets the antlers do the talking. An antler mount without plaque can look cleaner, take up less wall space, and fit a cabin, shop, hunting room, or home without the formal look of a traditional wood backer.
The key is not simply hanging antlers on a screw. A rack is often heavier and more uneven than it looks, especially with mule deer, elk, or moose. A proper no-plaque display needs a secure attachment point, a way to sit level, and enough adjustment to show the antlers from their best angle.
Why Choose an Antler Mount Without Plaque?
Traditional plaques have their place. They can protect a wall from contact with the skull plate, provide room for an engraved tag, and give a finished look to a formal trophy room. But they also add visual weight. On a smaller shed antler, they can make the display feel larger than the trophy itself.
A plaque-free mount puts the focus where it belongs: on the antlers. It works especially well for matched shed sets, cleaned skull plates, and antlers that have been saved from years of hunting trips. The display can sit closer to the wall and carry a more natural, straightforward look.
There is also a practical benefit. Without a plaque, you are not limited by the size, shape, stain, or style of a piece of wood. You can adjust the rack to fit the wall space and mount it vertically, horizontally, or at a slight upward angle. That flexibility matters when one side of the rack carries more mass than the other.
Start With the Right Antler Base
Your mounting method depends on what you have. A matched set of shed antlers requires a connection between the two bases. Antlers cut from a skull cap need support that cradles or fastens to the bone. A European skull mount is a different project altogether, since the full skull is the display.
For shed antlers, avoid drilling into the visible burr or main beam unless there is no other choice. A hole in the wrong spot can weaken the base and leave a permanent mark. The best setup supports the antlers from the bottom or inside the burr area, where hardware is concealed once the mount is on the wall.
With a skull cap, inspect the bone before mounting. It should be clean, fully dry, and free of loose material. If the skull plate was cut unevenly, the rack may naturally lean or twist against the wall. That does not mean the antlers are a lost cause. It means an adjustable mounting system is worth using instead of forcing the rack into a fixed position.
A Secure Mount Matters More Than a Fancy One
The wall connection is where shortcuts show up. A light whitetail shed may hang safely from a properly installed fastener, but a matched set, elk antlers, or moose antlers demand more holding strength. Mount into a wall stud whenever possible. If a stud is not available, use a heavy-duty anchor rated for the actual weight of the antlers and mounting hardware, not a light picture-hanging hook.
Before you drill, hold the rack against the wall at the intended height. Step back several feet. Antlers can look level at arm's length and crooked from across the room. Check the angle of the beams, how far the tines project from the wall, and whether the rack looks balanced with nearby furniture, doors, or other mounts.
A second set of hands helps here. One person can hold the antlers while the other checks position and marks the wall. This simple step is especially valuable with wide mule deer racks and any antlers that have a heavy side.
How to Mount Antlers Without a Plaque
The cleanest approach uses an adjustable bracket or purpose-built antler mounting kit. The mount should attach securely to the antler base or skull cap, then fasten to the wall through a strong metal connection. Adjustment is the difference between a rack that merely hangs and one that looks right.
Start by assembling the hardware on a workbench rather than against the wall. Position the bracket so it supports the rack near its natural center of gravity. On a matched shed set, that is usually near the burrs, where the antlers are strongest. On a skull cap, work from the bone structure instead of trying to clamp tightly against the antler itself.
Next, test the display angle. Some racks look best nearly flat against the wall. Others need the bases tipped slightly forward so the tines are visible and the beams do not disappear into the background. Keep the angle modest. Too much tilt can put unnecessary leverage on the wall fastener and make the display look awkward.
Once the rack is set, mark the wall mounting location, find the stud if available, and install the wall hardware. Hang the rack, then make final adjustments before tightening everything down. Give the display a gentle pull and lift test. It should not shift, rattle, or sag.
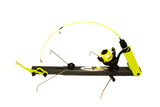
For hunters who want a dedicated solution, the Whiskey Gulch Antler Mount from Thresher Innovations is built for this kind of job. Its adjustable design gives deer, mule deer, elk, and moose antlers a clean wall display without relying on a traditional plaque. Purpose-built hardware saves time, avoids improvised fixes, and helps keep the trophy secure.
Getting the Angle and Height Right
The best mounting height depends on the rack and the room. For most deer antlers, placing the center of the rack around eye level creates a natural display. Larger elk and moose antlers often need more open space below and above them, so they do not crowd the ceiling or furniture.
Do not judge height only by the skull cap or mounting bracket. Judge it by the highest and widest points of the antlers. A tall tine can reach much higher than expected, while a wide main beam may interfere with a doorway or window trim.
Wall color also changes the final look. Light-colored antlers usually stand out against darker paint, stained wood, or stone. Dark, weathered shed antlers can look sharp against lighter walls. If the antlers blend into the background, a plaque may provide contrast, but it is not your only option. Better lighting and smarter placement often solve the problem without adding extra material behind the rack.
Avoid the Common Plaque-Free Mounting Mistakes
The first mistake is using hardware that is too light for the rack. Antlers are not framed photos. Their uneven shape puts leverage on the wall, especially when the tines extend outward. Size your fasteners for the weight and use a stud whenever you can.
The second is mounting before the antlers are clean and dry. Dirt, old velvet remnants, or moisture can stain the wall and create odors over time. Use a soft brush to remove dust and debris. If the antlers were recently found or processed, let them dry completely before bringing them indoors.
The third mistake is forcing symmetry where there is none. Wild antlers are not manufactured parts. One beam may sweep farther forward, one tine may sit higher, and one side may carry more mass. Adjust the mount to make the rack look intentional from the front. Perfect measurement is less important than a balanced visual result.
Finally, do not hide a good rack behind oversized décor. A plaque-free display works because it is simple. Give the antlers room, use hardware you trust, and let the trophy carry the wall.
A well-mounted rack is more than a set of antlers above the fireplace or workbench. It is a reminder of the hunt, the land, and the time spent earning it. Mount it solid, set it straight, and give it the clean display it deserves.
#whiskeygulchantlermount #happyhookericefishing, #thresherinnovations